Call us on: 07876 794098

activities

bushcraft leader with shelter

My Bushcraft Journal: Part #1 Building Better Shelters

Hello folks. My name is James and I am an outdoor activity leader at Woodland Classroom, where we pass woodland skills and nature knowledge onto others with our sessions. Bushcraft is an element of what we do, fire-lighting, den building and campfire cooking etc but mostly it’s at a basic level. For a while now I’ve been wanting to improve my bushcraft skills and really go much further in depth not only because I love being out in the woods but also so that I can pass these skills onto others someday and continue to inspire children to fall in love with nature and being outdoors.

So, I’ve taken the plunge and enrolled on a 2 year Bushcraft Instructor training course which is going to really push me to up my game which is not only going to be a lot of fun but will also help me to offer so much more to our customers in the future.

Fire by friction, wild food, whittling, advanced shelter building, natural cordage and plant identification are just some of the skills I’ll be covering over the next two years. I’m quite excited.

Who knows, perhaps I’ll be able to call myself a proper bushcraft instructor when it’s all done. Saying that though, you never stop learning and with any good subject worth getting your teeth into, bushcraft is one of those fields of learning that the more questions you answer, the more questions there are. I imagine I will never stop learning.

Part of my training includes keeping a journal of my time learning bushcraft skills, so I though why not make it a blog and you can share my journey, my successes and my inevitable failures too.

As an old teacher once said to me though, “There are no mistakes. Just learning opportunities.”

So without further ado, here is my account of a day spent shelter building.

bushcraft leader with shelter

Building Better Shelters

Aim of the Day: To construct a one-person shelter using only natural materials, preferably with no cordage, which would be rain-proof.

I had a dry and sunny winter day to do this with no distractions which was good because proper shelter building is a lengthy task. From my training I knew that it took 6 of us a couple of hours to construct an effective shelter from scratch, so I would have my work cut out if I as to get it done all in one day.

There had been some recent tree felling work in the woods, cutting down young hazel stools under the power lines, so this as perfect material with which to construct the frame with as hazel is strong, flexible and being freshly cut it should have a longer life span than using older, more seasoned wood from the forest floor.

I wanted to build a classic kennel shelter, sometimes called the a-frame shelter, which uses just 3 sticks to support the whole structure. The shelter also has little room for movement once you’re inside so that there is less air space to be warmed up.

building a kennel shelter

Above: In Ray Mears’ Outdoor Survival Handbook, he describes the stages of building the kennel shelter.

The first task was to find a piece of ground that is flat, no mean feat in Wales. Another tip I had been given was to get down low to the ground so that you can see the small undulations that make up the lay of the land. This way I could pick out a spot that was not only flat, but would not be a pool for water if the weather turned wet and also was slightly raised from the surrounding land, again to shed ground surface water if needed.

My tutor had told me the importance of of ensuring that the triangular frame is locked together well and that each pole is well supported. The most effective way to do this (without using cordage) is using the method seen in the next picture.

shelter build - interlocking polesHere, the ridge pole is resting on both forked sticks and these are also interlocked. This should help prevent slippage and ensures that the weight of the shelter is evenly distributed. I don’t want it all coming down on me in the middle of the night. For some additional support, I saw that there was a convenient stump which I could rest the base of the right-hand pole against. This is certainly not essential, but a bit of added piece of mind.

Next up I started placing the uprights on either side of the shelter frame. These were no closer than a good hand span apart as if they were too close then I would have trouble weaving between them later when building up the walls of the shelter.

I had also been advised to not allow the uprights to stick up too much above the ridge pole as this would encourage rainwater to run down poles and then drip through into the shelter – which I imagine could be very annoying at 2am.

For weavers between the uprights I mostly used birch branches that were lying around the woodland, as when green they are still flexible. Any that were too far gone and dry, went in  a separate pile for firewood. It was time to start a fire for a well earned brew in my billy can. Think birch is quickly becoming my favourite tree because the more I learn about it, the more uses it seems to have – perhaps that’s the subject of a future journal entry.

Birch’s associations with fire are well known in the outdoor pursuits world and it makes great kindling for getting a blaze going. As soon as the fire was going I felt like I had arrived properly.

building a natural shelter in the woodsAbove: Burying the end of the ridge pole into the earth to help prevent it from slipping. Resting one of the forked poles against a convenient stump for added stability. And getting my tea on with my new billy can.

During my Bushcraft Instructor training we had plenty of bracken around us to use as a thatched covering for the weavers on the roof. You can see an example of that in the first picture on this blog page. But at my local woods bracken was not an option so I would have to go with the less effective (so I’m told) leaf litter – which was in abundance at this time of year. There was plenty of beech trees about and their leaves make a carpet on the woodland floor and I know these leaves to last pretty well rather than rot away quickly so this seems a good choice.  Using a blanket I could gather up lots of leaves quickly and then drag the full blanket over to the shelter.

This was still much more work than I had anticipated though and I had been advised to have a full arm’s length depth of leaf litter on the shelter to make it effective against the worst the weather could throw at it. This was a real eye opener as it soon became apparent just how much material I would need just for my little one-man shelter.

shelter building in the woods of wales

Above: The complete naked skeleton of my kennel shelter, complete with weavers from fallen birch with some hazel brash too for good measure.

Another thing I noticed when using the leaf litter was that leaves had a habit of tumbling down to the base of the shelter so that I was ending up with a lot of material close to the ground and hardly any on top. Stuffing handfuls of leaves between the weavers seems to help this to an extent as it gave the leaves something to grip to. But I wonder if this is also a common problem when using leaf litter like this and whether with enough depth of material you eventually over come it? I wasn’t going to find out today.

The day was drawing on and I still wasn’t complete. By the time the light was failing I had to accept that the shelter would not be completed today (the luxury of not actually being in a real survival situation) and I would have to return another day. I had got one side of the shelter completely covered with a fair depth of leaves, but by no means enough, and I was satisfied that I could return another day and complete the job, ready for a trial sleep out.

My last job was to put out my small brew fire and scatter the cold ashes to leave no trace – an important philosophy in bushcraft.

So, what were the main learning points for me:

  1. Shelter building takes longer than you think.
  2. It’s important to get the 3 main poles locked together correctly to maximise stability and strength.
  3. Don’t put the uprights too close together.
  4. Don’t let the uprights protrude too far above the ridge pole, so avoiding night time drips.
  5. If using leaf litter – allow for A LOT of material.
  6. Stuff the leaves into the weavers to encourage them to group to the shelter sides.
  7. Get up earlier in the morning and start sooner *laugh*

half built shelter

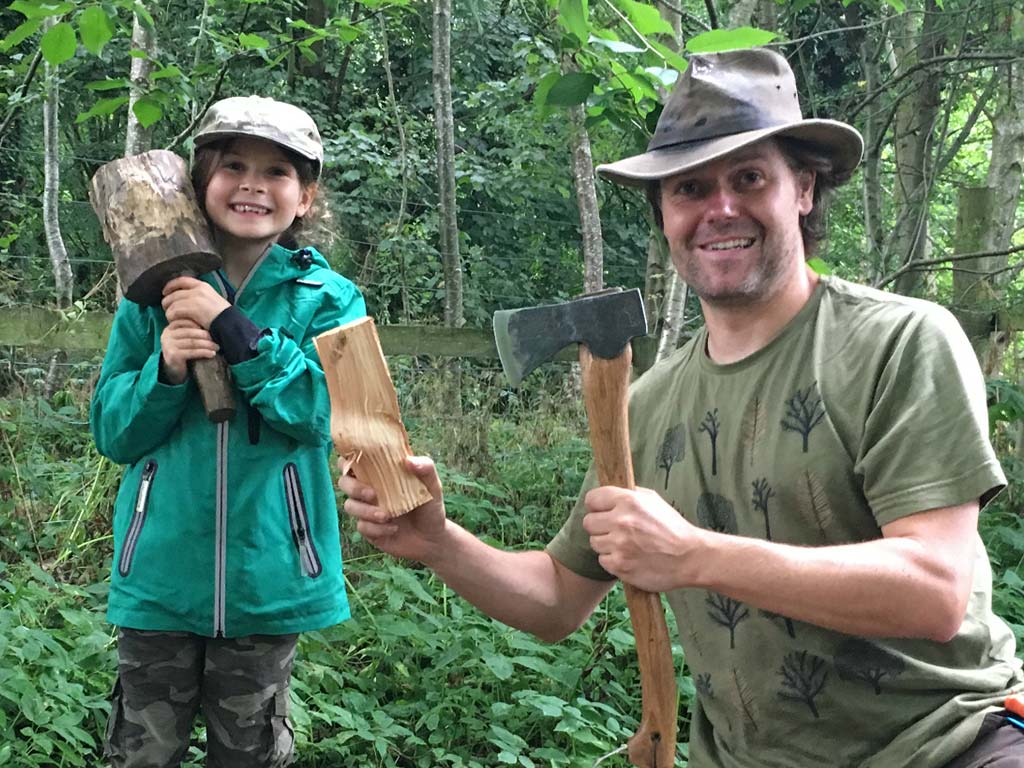
Above: The end of a day’s work.. well a leisurely days work anyway. I’m looking forward to coming back to complete the job and test it out.

That’s all for now. I hope to keep my Bushcraft Journal up to date with regular posts, so watch this space.

Thanks for reading.

James K

how the robin got its red breast

How the Robin Got its Red Breast

We love telling stories around the campfire with children at our outdoor activity sessions, especially those tales that are set in the woods and star the creatures that the kids could see for themselves. I think it helps bring the forest alive for their imaginations.

This short story, How The Robin Got Its Red Breast, is a great one to tell on a cold winters day with the campfire crackling away. For me, the story’s message is that no matter how small you are or seem to be, you can achieve great things.

“Long, long ago, when the world was new, as the winter Sun was setting, and the land was locked in ice and snow, all the creatures believed that the warmth they had enjoyed throughout the long summer was lost forever and might never return. They were cold and afraid.”

“As the winter winds blew through the forest, a small brown bird was sheltering in a holly tree and he thought to himself, ‘What could I do?’ Somehow he knew the warmth that had gone belonged to the Sun, so he decided to fly to the Sun and ask for it back. As he took flight the holly twig on which he was standing snapped off, so he took it with him, he thought it would make him feel braver to take a piece of home on his adventure.”

“He flew up, higher and higher he climbed, and as he flew, he felt the heat of the Sun increasing. He flew on, getting hotter and hotter, until he could hardly bear the heat any more and his feathers were scorching, he was so close to the Sun! But still, he was determined to get an audience with the Sun. Then suddenly the holly twig he was carrying burst into flames. He was so shocked that he fainted and fell, down, down, spiralling back to the Earth.”

“When he awoke he realised he still had the burning twig, clutched between his feet. He had done it. He had brought the Sun’s fire back to Earth, and everyone could warm themselves in the heat from the flames. He was a hero! And because he was so brave, and because his feathers had been scorched on his adventure, to this very day, he is still called Robin Redbreast.”

how the robin got its red breastArtwork by Karen Carter at Hedingham Fair

The Robin is probably the UK’s favourite bird. It’s known as the gardner’s friend because it’s often seen perched near to where earth and soil is being dug over, revealing lots of juicy worms. I’ve often had a Robin as my companion when I’m practising my bushcraft skills in the woods. he’s always hoping I’ll turn over some leaves or dead wood in the hope of a easy meal.

To find out more about the Robin, where it lives, what it eats and what it sounds like. You can visit the RSPBs website which should answer all your questions here.

Robin in the Snow

kids get off screens and outdoors

Why Kids Chose to Ditch Their Video Screens To Go Wild Outdoors

Children are choosing to leave their screens behind and are opting for a new outdoor game which combines bushcraft & survival skills inspired by their favourite video games which aims to get them reconnected with nature and excited about the great outdoors once more. It’s been so successful that activity leaders across the globe are now signing up to run this game, Wildcraft Adventure, for themselves at their venues and joining the mission to get kids off-screen and outdoors.

kids get off screens and outdoors

Kids make their favourite video games come alive in the outdoors.

Wildcraft, borrows themes from popular video games like Minecraft and is giving kids an outdoor experience they won’t forget. Though barely a year old, it’s been a huge hit with parents and children.

Contact us to find out more.

Taking Video Games to Our Wild Spaces

It was over a year ago, we were sat in our garden and asked the question; “For those kids who are spending too much time glued to their screens and have little interest in getting out into nature, how do we engage them in a way so that they choose to go outside? Simple, we take their video games outdoors!”

But this is not Pokemon GO, we’re not getting kids to take their mobile devices out into the woods and calling it ‘quality time outdoors’, they’re leaving those at home to play a video game style adventure for real in the woods which includes all the challenges they’ll be familiar with whilst at the same time engaging them in the natural world. Yes, there’s lots of hidden nature-learning woven into the game and they have to use their new knowledge and skills to gain points and experience throughout the day.

When creating Wildcraft Adventure, we did some serious research. We watched and spoke with children playing games like Minecraft and Terraria, and talked to parents about their experience of their children’s love of video games. It soon became very clear that although the children do get a lot of pleasure from the games, it’s become a real problem for parents, as they want to put a reasonable restriction on their child’s screen time. Parents told us that they faced an uphill struggle as there’s such an addictive quality to these games that restricting screen time can cause arguments in the family home. Many children do not seem to be able to easily drag themselves away from their screens. The more parents we spoke with, the more we heard about this recurring problem in the home.

We remembered back when Super Mario & Sonic the Hedgehog first came out. There are many common themes in video games such as collecting resources, protecting yourself from monsters, beating the boss, making potions and building your world, which all fit really well with the outdoor adventure we were creating. Our game requires players to use team building, problem-solving and lots of imagination.

minecraft kids get outdoors

Kids sometimes come dressed as their favourite video game characters. They use new skills and their imaginations to build their camp.

Opening Up A Natural World of Adventures

Wildcraft is also proving to be a great gateway activity for kids who are coming along to our days and then wanting to know more about bushcraft, forest school and associated outdoor activities that are out there.

“Before coming I had tried to get (my son) to join in a forest school day but he said ‘it wasn’t his thing’. However ‘would you like to go on a Minecraft style bushcraft day?’ And he couldn’t sign up fast enough, he was so excited he couldn’t sleep the night before and you certainly didn’t disappoint on the day. Thank you.” Parent

We’ve heard so much about the growing concerns that so many parents have about the increasing amount of time that children spend in front of screens. And our Wildcraft Adventures are providing an antidote for that. We believe it’s really making a difference in inspiring children to get outdoors more.

“They were so inspired that they will be joining a local bushcraft group, so thank you.” Another Happy Parent

We’ve hosted over 35 of these events across Wales now, reaching hundreds of children. We’ve massed up over 4,200 hours of outdoor playtime for kids, when they might otherwise have been indoors playing computer games. So to us, that’s a really positive thing. Don’t get us wrong, we agree video games can be great fun, but what kids today need is a healthy balance in how they spend their time. Nature Deficit Disorder is a growing problem in our young people today.

Going Global

Woodland Classroom have teamed up with the National Trust and other venues across Wales to bring these events to as many children as possible. But they’re ambition to get more kids off-screen doesn’t stop there and now they have made Wildcraft Adventure available internationally to anyone who runs their own outdoor activity programmes so that they can run the event at their own venue. Activity Leaders in both in the UK and the US have already signed up to join the mission.

You Could Run Your Own Wildcraft Events

If you’re an activity leader who would be interested in hosting Wildcraft Adventure at your venue, then you can find out more HERE.

Wildcraft sets the players a number of challenges based in a whole day of activities. There are elements of forest school and bushcraft involved which combine with the video game theme to make a stand-alone lesson plan for experienced outdoor activity leaders to deliver.

“We’re really excited about the Wildcraft Adventure… I was really inspired by what you guys are doing.   We’re looking for ways to get our kids out of the classroom, playing together.  Your game gives us the perfect vehicle for mixed-age, cooperative, outdoor fun.” Brenda Sutter – Laurel Tree Charter School, California US.

In popular video games like Minecraft and Terraria, players have to survive in a hostile environment, build their own house, hunt for their food, search for materials and fend off wandering monsters. You can tell parents that their child may be able to survive in the wilderness on the computer screen, but can they do it out in the woods? Wildcraft slams down the gauntlet and kids are taking up the challenge.

What Parents Are Saying About Wildcraft

“Such a fantastic antidote to the ever increasing creep of the screen! Highly recommended and ever grateful.”

“My son had a fabulous time in a caring and safe environment. As an avid computer gamer, to spend all day outside living as a survivor was an amazing experience for him.”

“What an amazing experience for my son. Like many parents I worry about the time he spends on electronic games and the fact that I have to beg and bribe to get him outdoors. Not so with this genius idea to use popular computer games to tempt him into activities that I knew he would love if he would only give them a chance. When asked if he wanted to go again, my son’s reply was “no, Mum. I HAVE to go again.”

Parents who want to find out when and where the next Wildcraft Adventure is being run by Woodland Classroom can check out their upcoming events page HERE. We have also developed a version of the Wildcraft game that you can play in your own back garden with the kids. It’s called the Wildcraft: Home Edition. You can find out more about that RIGHT HERE.

If you want to find out about Wildcraft Adventures running outside of Wales then drop us a line to find out where you can sign up for a game near you.

children learning firelighting skills

children learning firelighting skills

LETTING YOUR CHILD PLAY WITH FIRE

Would you let your child play with fire? It seems to be wired into us from a young age that fire is not something to mess around with, but where’s the fun in that? Of course, fire can be dangerous but if we introduce our children to it using safe methods we can nurture a healthy respect for the hazards of fire alongside their natural wonder for it.

Here’s the thing, children LOVE playing with fire – so we might as well teach them how to play with it safely and how to be responsible when lighting their own fires out in the woods. We’ve never had a burn injury at our Forest School sessions. We have established boundaries for the main campfire and clear rules on what kids can and cannot do with their own fires.

In this episode of our vlog Rewild My Child you can see our regular Young Rangers lighting their own fires and passing on some of what they’ve learned.

YOU CAN WATCH THIS EPISODE OF OUR VLOG RIGHT HERE…

I find it so encouraging to see how far these children have come with their firelighting skills and knowledge of camp craft. It’s very satisfying (as a teacher) to see them gathering enough kindling to start their fire, picking out dry sticks rather than wet, soggy ones and to see how they can rekindle a struggling fire using the right techniques. These children love lighting fires and are happy simply to let them blaze away  – I’ve never seen a child trying to burn the woods down. They might make smoke signals, make charcoals for drawing or simply poke away at the embers with burning sticks. The fire acts as a warming and comforting focal point for the group to be together, enjoying nature. This has been the role of campfires for generations and long may it continue.

If you liked this and want to see more – check out our YouTube Channel, where we have a whole host of videos from How To Make Wild Teas to How To Use An Axe With Kids.

muddy boy outdoors

MUD KITCHENS – free, easy & just brilliant!

If there is one thing you can guarantee in this country, it’s rain! We get a lot of rain, but if we let it stop us from doing things we’d almost never do anything or go anywhere.

So, we say embrace the rain, work with what you’ve got. Use all this water and mud to your advantage. It’s a resource to be cherished, after all, it is a giver of life and we wouldn’t have such beautiful countryside if it wasn’t for the rain. I thought back to the last time I went on holiday to a hot and dry country, beautiful but scorched landscapes with plant life struggling to survive, and then the feeling of returning home to the UK and seeing all the lush green abundance of growth around me. I know I felt blessed that I live where I do.

That said, the rain can and does get you down at times, especially when it seems relentless, but here at Woodland Classroom we try and find ways in which activities can still go ahead despite the weather and actually work with it, using the weather to our advantage. This is where the mud kitchen comes in…

muddy girl outdoors

We’d seen lots of pictures on Pinterest about mud kitchens so we dug out some old pots and pans, a few planks of wood, some tree stumps, wooden spoons and an old camping kettle; set it all up. The kids added the final ingredient… imagination.

It was the first time we’d done this activity but the kids new exactly what to do, some made apple pie, some made Christmas cake and some just liked the feel of the mud on their hands. For the youngest tots we say how they simply enjoyed pouring mud and water from one container to another.

One intrepid group of adventurers went in search of fallen apples to add to their mud pie. They came back with hazelnuts, pine cones and all kinds of ‘ingredients’ for their creations. We were over the moon at how much the kids loved it, it was easily one of the best activities we have done to date and so easy to set up and (best of all) it cost nothing.

If you want to try this for yourself and don’t want to use your best pots and pans from your kitchen then you can pick up suitable stuff at junk shops or charity shops for next to nothing and we promise it will be worth it. A little corner in your garden dedicated to a mud kitchen will keep your little ones happy even in the worst of weather, just kit them out with good waterproofs and you’ll be well away.

We decided to make a quick video showing you how we set up our mud kitchen and to show you that it doesn’t need to be fancy or overly engineered, so take a look for some inspiration for setting up your own mud kitchen.

Here is an account of one of one parent’s experience after watching our video:

“We set up our mud kitchen after your prompt over the holidays, something I’ve been meaning to do for ages… Took no more than 10 minutes, and they all have played and played out there. Lleucu was out ’til dark making snow soup this evening and only came in cause she was soaked through, literally down too and including her pants and she was freezing.” Belinda Knott (parent)

So what are you waiting for? Get out and get cooking. Mississippi Mud Pie, Chocolate Log, Stone Soup and more will be on the menu. What will your child cook up?

muddy wellies in the woods

nibbled nuts found on winter scavenger hunt

Awesome Winter Scavenger Hunt

So… it’s winter. The days are cold and short, but it’s still a great time to be out and about and see a host of things in the woods that you’d not see at other times of the year. Winter leaves our countryside bare, open to deeper exploration and let’s you poke your nose into all sorts of nooks and crannies that would be walled off with greenery come summertime.

Kenneth Grahame, author of the popular children’s novel The Wind In The Willows, painted an evocative picture of the countryside in winter, which hints at the secrets that are waiting to be discovered;

“The country lay bare and entirely leafless around him, and he thought that he had never seen so far and intimately into the insides of things as on that winter day when Nature was deep in her annual slumber and seemed to have kicked the clothes off… He was glad that he liked the country undecorated, hard, and stripped of its finery. He had got down to the bare bones of it, and they were fine and strong and simple.”

There were plenty of winter adventures for Mole, Ratty and Badger, so in order to inspire you to make your outdoor experience one that the kids will love too we have devised an awesome Winter Scavenger Hunt that will stimulate all the senses of your child. The only sense we haven’t got covered is taste – but we’re sure a nice hot chocolate at home after the walk will tick that box. We hope our scavenger hunt will make going outside in winter a memorable and exciting experience for the whole family. Give it a go and let us know how you got on.

DOWNLOAD OUR AWESOME WINTER SCAVENGER HUNT HERE

winter woodland scavenger hunt

You can share pics of your scavenging adventures on our facebook page, we’d love to see them.

We always host a great range of activity days right through the Autumn and Winter months, because we believe it’s important for kids and adults to get outside more than ever during these times when many people shut themselves away indoors. You can check out our upcoming events HERE.

boy at forest school in winter with candles

Making the Most of Winter in the Woods

boy at forest school in winter with candles

Wintertime in the woods changes things quite dramatically. The cold, wet and early darkness means thinking differently about the activities we do with our children. Something that the kids look forward to as we approach midwinter is our Winter Wishes activity, something that’s simple enough to recreate yourself.

As the nights draw in I’ve found the children are naturally drawn to the campfire, they head for its light and warmth. Here stories can be told, chestnuts roasted and fire-sticks made. There is also a magical feel to this time of year that can be embraced as well as encouraging the kids to think about what’s going on in nature around them.

Children are full of excitement and anticipation for Christmas and the school holidays. They are mesmerised by the darkness and the dancing flames, it is a time for wishes and wonder and staying close to each other for warmth and protection.

Winter solstice (which falls between December 20th & 21st) is a turning point where (in the northern hemisphere) we are at the peak of the darkness, it being the shortest day and longest night. There is the knowledge of more light to come, as from this day forth the days get slowly longer and with that comes a deep sense of hope, new beginnings and the promise of spring.

At our Forest School we winter solstice at forest school with kidslike to mark the winter solstice as this is all about welcoming the returning light to the earth and it gives the children a chance to reflect on their year just gone and their wishes for the coming year.

We mark this occasion with out Winter Wishes activity. Whilst sat in a circle, away from the campfire, each child has a turn to light a candle and make three wishes;

One wish for themselves

One wish for their community

and one wish for the Earth.

We don’t insist that the children speak their wishes out loud if they don’t want to. This gives them the option to make a very personal wish that they may otherwise be too embarrassed to speak out loud to the group.

As each child lights a candle and adds it to the growing cluster of others the light increases, mirroring the increase of sunlight and turn of the wheel of the year as we move through winter and toward spring.

Winter solstice is a moment of pause between two cycles, a moment of transition that can be held and savored….take a moment to experience this edge between these two great cycles. It is also a moment to look forward, to name the new seeds and intentions we wish to take into the next cycle.” Glennie Kindred, Letting in the Wild Edges

I feel that it is important that we give the children a chance to wish for the wider community, especially as at this time of year it can be very easy for kids to get wrapped up in themselves as they receive so much over the Christmas period. Setting good intentions for the world can be their way of giving.

children around campfire in winter forest school

There’s plenty of other fun and games to be had in the winter woods. Our kids cook damper breads on a stick, use flashlights and Morse code to send messages through the dark, they light their own fires and cook baked beans in their tin (cowboy style) to share. All this helps dispel the fear of the darkness and develops their night vision by using all their senses. The kids go back to their homes with rosy cheeks, smelling of wood smoke and full of tales of shadows and mystery. Outdoor learning and play certainly doesn’t need to stop just because it is winter.

Happy holidays!

why kids should use axes

Why I would buy my kids an AXE

At a time when many children are being wrapped up in too much cotton wool (not literally) to keep them safe from the perceived hazards of modern life, I’ve become more and more a champion of allowing the children I look after (at Forest School sessions) to take risks and show they can be responsible for managing their own safety. So, with that in mind, we’ve been chopping firewood together, using a very sharp axe, and here’s a little video which shows you how I teach those basic axe skills to kids. I’d encourage you to try it for yourself.

Autumn has definitely arrived here in the UK and with the long, dark and cold nights closing in my mind’s turned to getting some firewood in. Yes, like many others I’ve left it late again. It’s always good to have some help with tasks like this and I’ve found that chopping firewood is an effective and simple activity for kids to get stuck into as well as a great introduction to the axe. Kids can understand the task and (most folks agree) splitting logs is very satisfying to do. So what about giving a razor sharp axe to a child? Well, here’s what the children’s author Roald Dahl had to say about risk;

“…the more risks you allow children to take, the better they learn to take care of themselves. If you never let them take any risks, then I believe they become very prone to injury. Boys should be allowed to climb tall trees and walk along the tops of high walls and dive into the sea from high rocks… The same with girls. I like the type of child who takes risks. Better by far than the one who never does so.”

Mabli (one of our regular Young Rangers) is just six years old and it was really encouraging to see her progress recently from using the potato peeler (which we give to kids first to practice their knife technique) to using a proper whittling knife. She was confident, calm and sensible with the tool, which I like to think she learnt through clear mentoring, encouragement and close supervision. There’s a voice in my head which jostles for centre stage telling me that there’s going to be a terrible accident and that it would be better to just let kids like Mabli play at something safer. But of course, children are just like us, they don’t want to hurt themselves, so along with a good mentor (like any parent), they’re their own regulator.

teaching children to use an axe

Anyway, back to the axe and chopping wood. I think this is a great introductory activity for kids to sharp tools as with an axe you have a fair distance between the sharp edge and little fingers. Also, whoever heard of such a thing as an ugly piece of firewood? So, no fine craft skills are required. You could even follow wood chopping with learning fire-lighting so that they get to burn what they’ve chopped themselves. I’ll give the last word on ‘risk’ to Richard Louv, author of the fantastic book Last Child in the Woods;

“An indoor (or backseat) childhood does reduce some dangers to children; but other risks are heightened, including risks to physical and psychological health, risk to children’s concept and perception of community, risk to self-confidence and the ability to discern true danger.”

So, would you use sharp tools with your own kids at home? Have you had success with whittling, wood chopping or using a saw with little ones? We’d love to hear from you.

If you enjoyed this video, we’ve got MORE videos on our YouTube channel giving you ideas for engaging kids in the great outdoors. You can find it by clicking HERE.

Wildcraft Adventure

The “REAL” Minecraft

Using the computer game itself to get the kids off the screen and outdoors!steve

At Woodland Classroom we decided to do something a little different with our Forest School sessions and meet the kids on their level.
James was inspired by a brilliant book he has been reading “Coyotes Guide to Connecting with Nature’ where he read about taking what is popular with young people at that current time and transforming it into an outdoor activity. Well that was easy as Minecraft has taken the world by storm, it is hugely popular amongst children of lots of different ages and is easily transferable to the outdoors.
The game itself involves building your own world using blocks, there are tasks to complete like building a shelter and a fire before nightfall, this will keep the creepers away.
You can mine for rocks and minerals, you can make or craft things that help your survival, this is done by following a ‘recipe’ or a list of things needed to create your item.
Any way I’m sure all you parents out there already know this and much more as kids seem to be absolutely enthralled by this game.
With this popularity also comes concern about the amount of time the children are spending on the computer when they could be outside in the fresh air, getting exercise, interacting with others and developing lots of social and emotional skills.
So we launched our first date at Denmark Farm, Lampeter, during the school holidays, it was booked up within four hours of putting it on facebook, so we set another date, this too booked up straight away.
We spent the first few weeks of summer doing our research about Minecraft, talking to children and reading Minecraft magazines and watching it being played.
We came up with a lesson plan for a day of Minecraft activities and got crafting ourselves, we made wooden chests, green cloaks for the creepers and painted stones for iron ore and emeralds.
On the 17th Aug we ran our first Minecraft day, we had a great time, it all went very well and the kids loved it!
The second day also went well, we even had children travel up from Swansea to attend our day.

Here are the children at the end of day one:day1wholegroup

Some children who attended were known to us because they attend our weekly club ‘Young Rangers’ and a few had never played Minecraft before but this did not matter, it was totally inclusive to non-Minecraft fans also.

Some of the skills developed through these activities were communication and negotiating skills, each team had to delegate jobs to the team members and they could trade items with other teams. There was also a huge emphasis on team work.

Here is Briar trading an iron ore with another team.briartrading

Some other skills involved using numbers as each precious stone was worth so many points, they had to work out whether trade was worth it to them or not.

There were many other skills being developed as the activities took place and as always we encouraged their learning about nature itself, we dropped lots of small lessons into the mix about wildlife and allowed time for free play within the boundaries of the game and as always we allow choice in our activities. There was no pressure on any of the children to complete all the tasks, they did which activities they preferred and there was a sense of them being in charge of their own play and experience, we just provided the platform.tradingtable

We are now planning on running four days at Aberystwyth over the October half term and the response has been incredible! We are in talks about more dates to accommodate all the interest.
We are also working on a published version of our lesson plan so people can use our ideas to run their own events so watch this space!
Thank you to everyone for the amazing support we have had.

day2wholegroup

Thanks again and watch out for those creepers!onegreencreeper


Making Wild Teas with Kids

Want a great and simple way to get kids engaged in the outdoors? We’ve uploaded a video to our YouTube channel showing how to make yummy wild teas and how successful this has been with children. Enjoy!

So, to recap….

We used the following common plants in our wild teas; stinging nettles, goosegrass or cleavers, dandelion (petals only) and mint.

You can play around with the combinations of these and there’s plenty of information out there in Google land on other wild plants to use to flavour your teas.

Try making your very own herbal teas or “woody waters” as our Forest School group calls it. All you need is a cafetiere. It’s a great excuse to go for a walk in nature, get kids looking closely at the plants around them and dip your toe into the wonderful world of wild food and foraging. You’ll be pleased to hear that the plants you’re looking for are easy to find and identify.

Picking nettles without getting stung can be tricky but a great trick to impress kids once you’ve mastered it. Most of the stinging hairs are on the top of the leaves so grab the plant by the bottom of the leaves or the stem. Of course, you can always use gloves if you want to be extra safe. The tastiest parts of the nettle are the young tops. Once you’ve got enough nettle leaves place them in to the cafetiere, pour on hot water (which you’ll be pleased to hear also eliminates the sting) and leave to brew for a few minutes before pushing the plunger and serving up.

For a sweeter brew, try adding some mint leaves and even the fussiest eater should enjoy the refreshing tea especially if they have foraged for the leaves and made it for themselves.

Everyone knows the dandelion, and when in flower they’re easy to spot. The petals have a sweet taste to them, like liquid sunshine. You can also eat the leaves, though they’re quite bitter – give it a go.

Let us know how your experimental recipes go. We’d love to hear from you.

Social Share Buttons and Icons powered by Ultimatelysocial