Call us on: 07876 794098

Tag - craft

forest school and outdoor education in wrexham, north wales

WOODLAND CLASSROOM LANDS IN WREXHAM!

We have some VERY exciting news! We are finally able to announce that we’ve gone into partnership with the National Trust at Erddig Hall & Gardens and Chirk Castle, both in the county of Wrexham. What this means is that James and Lea are moving Woodland Classroom up to Wrexham and from September we will be able to bring all our existing popular outdoor clubs, as well as some new ones, to children in the area and offer our outdoor education services to audiences in North Wales, Cheshire, Shropshire, Merseyside and beyond.

James explained his connection with the area; “I’m originally from this neck of the woods where I worked a lot with environmental organisations in Cheshire and North East Wales, so this feels like coming home and I’m really excited about this opportunity we have with the National Trust who have made us very welcome and have been totally onboard with all the ideas we have to offer our activities in the area.”

Our new base of operations will be Felin Puleston Outdoor Centre, which lies on the edge of the Erddig estate on the doorstep of Wrexham town. It’s a great location for locals to be able to access it easily and is currently also the home of the National Trust’s GAP (Green Academies Project) funded by the Lottery which has seen lots of new energy and restoration work go into Felin Puleston with a host of improvements to the venue which makes it perfect for visiting groups who want to learn more about nature.

felin puleston outdoor centre

Our new home at Felin Puleston, Wrexham. Kids building dens with us. The vegetable garden where kids can learn how to grow their own.

We feel incredibly lucky to have full access to this tailor-made venue. The Outdoor Centre includes an allotment for growing vegetables, a wildlife garden, orchard, den building area, indoor function room and kitchen for craft workshops and classroom sessions, and of course the beautiful 1,200 acre Erddig estate which lies on the other side of the gate for the children and groups to explore.

forest school in wrexham

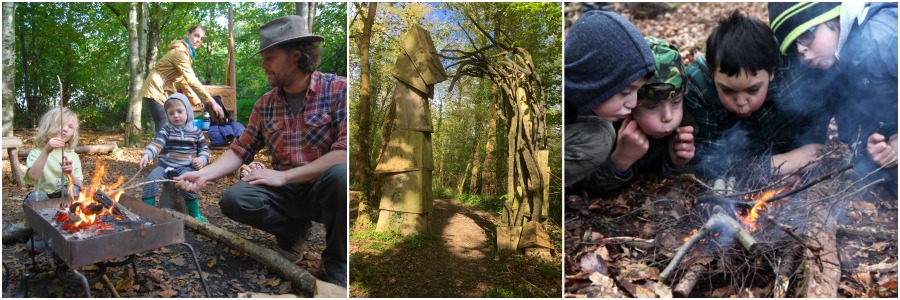
Our Little rangers parent & toddler group. The entrance to Forest Wood at Erddig. Boys learning fire-lighting skills at our sessions.

We also have the River Clywedog on our doorstep along with a wildlife pond both home to a wealth of water life which means that activities like pond and river dipping are going to be very much on the menu.

Susan Jones is the Volunteer & Community Involvement Manager at Erddig;

“We are delighted to be working in partnership with Woodland Classroom.  Providing enjoyable and meaningful experiences in the outdoors helps us to connect with nature, improve our mental and physical wellbeing and value the world around us so we can continue to care for special places like Chirk Castle and Erddig, forever for everyone.”

outdoor activities for children erddig wrexham

Erddig Hall & Gardens. This stunning National Trust property sits at the doorstep of Wrexham town.

In addition to making the most of the Outdoor Centre, we’re going to be able to welcome groups of all ages to Forest Wood, a beautiful forest school site based in the heart of Erddig’s ancient woodland. Think tall trees, wild garlic and woodland wildflowers. It’s a fantastic spot for woodland learning.

About Woodland Classroom

wildcraft adventureSo, who are we? Well… James and Lea have been running Woodland Classroom in Lampeter, Ceredigion since 2014 where they have hosted schools, organisations, adult learners, after-school clubs and kids birthday parties with a range of outdoor activities including; bushcraft, forest school, traditional woodland crafts, mindfulness and CPD training. All of this and more will now be offered at our new home.

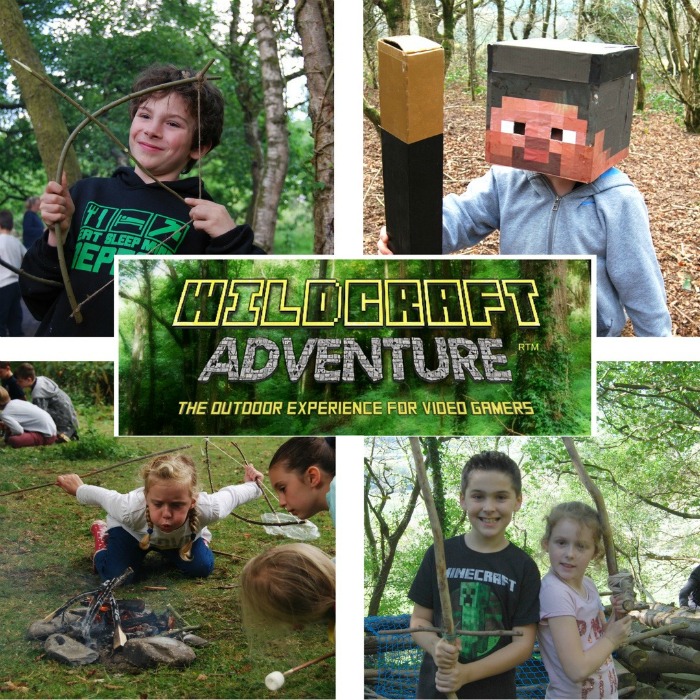
They are also the creative minds behind the hugely popular Wildcraft Adventure™ which takes kids’ favourite video games like Minecraft and transforms them into outdoor adventures that engage children in a host of physical challenges and bushcraft skills which score them point along the way, just like a real video game. There’s even a monster to run away from! It’s been so popular that outdoor activity leaders across the world are nor running the game; from California to Scotland, from New Zealand to Canada. James and lea are planning many more Wildcraft Adventures at their new Wrexham home for the near future.

Woodland Classroom are members of the Institute for Outdoor Learning and Forest School Wales.
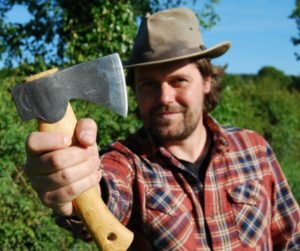
james kendall - profile picJames Kendall

James is a qualified Forest School Leader, Social Forester and experienced Woodland Skills Tutor. He has worked widely with children, young people and adults, leading on a variety of outdoor education and environmental projects. He has worked for several well-known environmental organisations and was also Project Manager for Long Wood Community Woodland, the largest community owned woodland in Wales, overseeing management of 300 acres of forest. He enjoys working with schools and communities to raise awareness of the environment, where his enthusiasm for spreading the message of learning through nature comes through. Lastly, but not least, he is currently undertaking a 2 year long course to become a bushcraft skills activity leader with the Bushcraft Competency Certificate scheme run through the Institute for Outdoor Learning.

“As a child, my Mum would bring me and my sister to Erddig and Chirk Castle where our imaginations could run wild with all sorts of play. I never thought I’d get the opportunity to actually work here and it seems fitting that I’ll now be able to offer outdoor adventures and learning for kids coming to these National Trust properties.”

lea kendall - counsellor and life coachLea Kendall

Lea has years of experience working with children and young people, including 4 years working in a primary school as a Learning Mentor focusing on the social and emotional aspects of learning and working one to one with vulnerable children and challenging behaviour. She shares her time leading activities for Woodland Classroom with my work as a qualified integrative Counsellor. Lea is also a qualified practitioner of Mindfulness in woodland settings.

“I am a firm believer in the power of nature to be therapeutic for everyone. I believe that play for all ages should be a large part of our lives. My training as a Counsellor worked toward my long-term goal to incorporate nature and play therapy into our future services. I am passionate about finding ways to increase the self-esteem of people and encouraging motivation through positive experience, shared enthusiasm and a nurturing environment.”

Lea is now offering the first of her planned nature therapy courses with two Mindfulness events for adult learners scheduled for this autumn. See our events page to find out more.

We Can Also Travel To You

Not every group who wants our services has been able to travel to us though, and for some schools such travel can be a costly or complicated business, so we’ve always offered the option for us to come to your school or venue and we have hosted many Forest School and bushcraft sessiosn on school grounds, at events, or anywhere that wants us really. Want to know more? Just get in touch.

outdoor kids club in wrexham, north wales, forest school

About our Outdoor Kids Clubs

Little Rangers is a weekly woodland parent and toddler group for children aged up to 5 years which follows the Forest School approach of child-led play and outdoor activities in a welcoming natural space. Activities are based around our central campfire and tots can get stuck into the mud kitchen, build a den, explore the wood or do some campfire cooking. Sessions are also a chance for like-minded parents to meet and share time together whilst their children are at play.

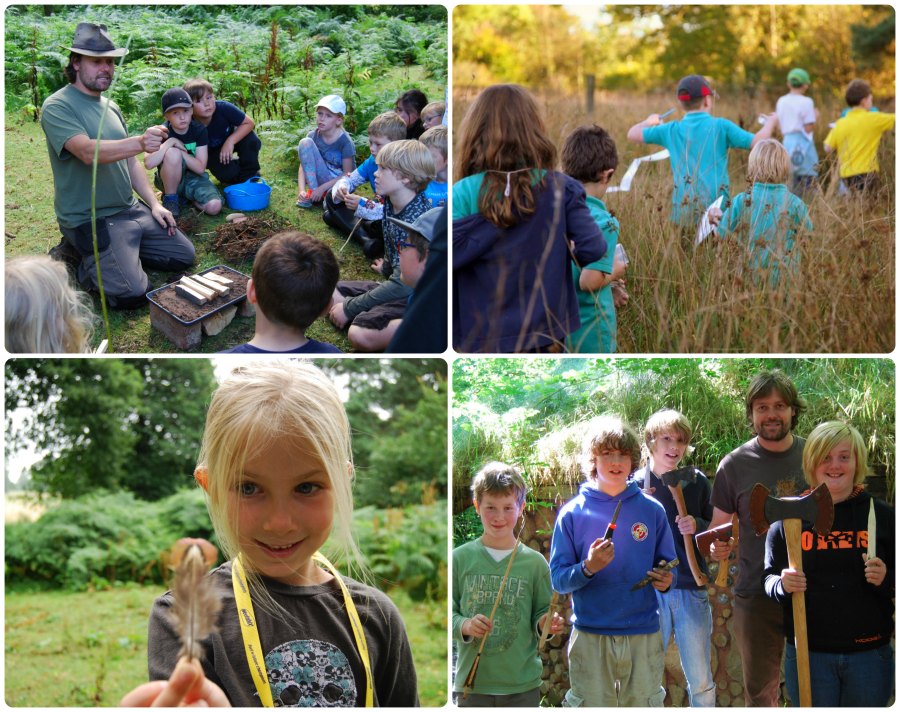
Young Rangers is our weekly after-school club for primary school aged children from 6 – 11 years. Parents drop their kids off with James and Lea where children will get the chance to play off steam after a day in school and take part in guided activities including bushcraft, outdoor games, crafts and campfire cooking.

Pathfinders is brand new to Woodland Classroom, a regular group for Home Educated children and their families. It’s something we’ve been wanting to offer for a long time, and we’ve been asked my Home Ed parents time and again if we could do this. Our move to Wrexham has offered the perfect opportunity for it to start. Sessions will be fortnightly and children from 0-16 will be able to join either our Forest School group where they can engage in child-led play and outdoor activities, or they can join our structured learning sessions where they will get quality tuition from James or Lea in environmental education, bushcraft and traditional woodland craft skills.

We’re hosting a taster session for Pathfinders on Tuesday 22nd August which is half-price for children and adults to come and see for themselves how this new club will work. If you’d like to find out more about the taster session, just CLICK HERE.

To find out more about our new kids clubs based at Erddig, and to take advantage of ‘early bird’ booking discounts just follow THIS LINK.

family fun day in the woods

Even More Opportunities at Chirk Castle

forest school circle at chirk castle

The ‘woodland classroom’ amongst the ancient trees of the Chirk Castle estate.

Wrexham county is quite unique in that it hosts two major National Trust venues just within 15 minutes drive of each other. Not only will be offering our services to groups at Erddig but just down the road is the equally amazing Chirk Castle with it’s 480 acres of gardens and estate including deer parkland and ancient woodland. It’s a perfect venue for outdoor learning and we’re looking forward to getting stuck in and welcoming groups to our sessions.

Jon Hignett is the Visitor Experience Manager at Chirk Castle for the National Trust;

“We first started working with Woodland Classroom in April 2015 when our estate was used as the venue for their very popular Wildcraft Adventure sessions, using the clever template of explorer/builder type video games to engage with children in the outdoors. We could see from the first meeting that it would be a popular activity, and it has been a very effective partnership allowing experienced professionals to use Chirk Castle’s estate to help to move, teach and inspire young visitors and connect them with the outdoors at a young age. We’ve collaborated on a few projects since then, and throughout James and Lea have been wonderful to work with, positive, engaging, and committed. We’re eagerly looking forward to what future collaborations might bring!”

outdoor activities at chirk castle

Chirk Castle & Gardens, hosts over 480 acres of parkland estate within which we will be running our outdoor events.

What the Future Holds

Not only will we be offering our tried and tested activities for children, our the plan is to expand our work with adult learners also, making Felin Puleston Outdoor Centre a real hub for environmental education for all ages. We plan to offer training to adult learners in the following subjects:

Bushcraft, Tree Identification, Greenwood Crafts, Woodland Management, Mindfulness, Eco Therapy, Nature Awareness, Foraging and Leathercraft.

outdoors home ed group in wrexham

So, it’s exciting times for Woodland Classroom and we can’t wait to meet all the new people we will be working with.

Right, that’s enough typing for now… we’ve got a whole house full of stuff to move.

If you’d like to find out what we could offer you or your group at Woodland Classroom, then please get in touch. You can email us at hey@woodlandclassroom.com or phone James and Lea on 07876 794098.

tasty bread from a dutch oven

My Bushcraft Journal: Part #2 Baking in a Dutch Oven

Baking bread out in the woods has always been one of those mystic arts to me. Something that, like tool sharpening, seems shrouded in mystery. With my ongoing Bushcraft Instructor training I thought it was high time that I made an effort to try it for myself. What’s the worst that could happen?

I also had a 4 litre dutch oven sitting in my shed, which was a Christmas present 2 years ago. I always felt a bit guilty when I came across it. So it was time to do it justice.

I’ve seen it done before but couldn’t for the life of me remember the exact method the teacher used at the time. So when it came to our next bushcraft training sessions I told everyone that I would bake them a loaf for the evening. The challenge was on.

The trick to using a dutch oven, as far as I understood it, was to get an even heat around the whole pot so that your bread would bake all round. So what was needed was a campfire that had been burning for a while to produce a good amount of hot coals, more like what you’d get in a barbecue. It’s this bed of coals and ember that makes an effective cooking fire, rather than roaring flames. I actually brought along some Welsh charcoal for the bake as I wasn’t sure what state the communal fire would be in by the time I came to experiment. This worked really well but I imagine if you use hardwood firewood and burn it down to coals it would be just as good.

cooking bread in a dutch oven for bushcraft

Above: This is not the same loaf as I cooked as it was dark by the time I was baking. You can see though how the coals have been placed on top of the oven lid it help it bake with an even heat.

The good news is that the loaf was a success! In fact it was one of the best loaves I’ve ever tasted, and even better that it was fresh out of the oven. Everyone complimented my on it and the mystery of using a dutch oven is firmly behind me, though I imagine there’s a lot to learn yet. For anyone who wants to give it a go for themselves I’m going to share that tasty recipe with you now….

STOUT & FRUIT SODA BREAD

This recipe fed 6 adults with a very generous slice of bread. They all loved it. Any left over stout can be generously gifted to a camping buddy that likes that sort of thing. I prefer cider myself. Having enjoyed this loaf myself I can say that it was delicious straight out the oven and didn’t even need any butter to improve it though you can try that if you like. It tasted more like a cake than bread 🙂

WHAT YOU NEED

4 litre dutch oven • large mixing bowl • mixing spoon (whittled by yourself preferably) • a metal dish that will sit in the bottom of your oven • 4 small stones (trust me)

INGREDIENTS

2 big overflowing handfuls of strong wholemeal flour

2 big overflowing handfuls of strong plain flour

A half handful of sugar (caster sugar is best as it’s finer)

1 heaped tablespoon of baking powder

1 good pinch of salt

1 big overflowing handful of mixed dry fruit

1 egg

1 can of stout

Keep some extra spare flour left aside for dusting the metal dish

METHOD

Mix up all the dry ingredients together. I did this in advance before the trip and put them in a plastic tub so it would save doing it around the campfire at night.

In your mixing bowl make a well in the middle of the dry mix and add crack the egg in. Then mix with your wooden spoon.

Slowly add the stout until all the dry ingredients are mixed in and you have a ball of dough that holds it shape.

Coat your metal dish in a light layer of your spare flour. This will stop the bread from sticking to the dish.

Place your dough onto the floured dish and sprinkle a little sugar on top.

Now it’s time to use those 4 mysterious small stones. These are placed evenly spaced at the bottom of the dutch oven. The metal dish is then placed on top of these so it sits comfortably. What this does is elevate the dish from the bottom of the dutch oven to allow the air to circulate. This all helps prevent the lower crust from burning.

Place the lid onto the oven and pop it into your campfire.

We surrounded the oven with a ring of charcoal and placed some hot coals evenly on top. This is the part of the process that inly experience can teach you and I’m looking forward to trying this recipe again and seeing if the cooking time changes. I imagine it depends on how hot your fire is and how even the coals are around your oven.

I checked the loaf after 15 minutes and we all agreed it needed longer.

I cooked my loaf for 25-30 minutes but I think i could have got away with taking it out a bit sooner. You will see some burn on the left hand side of the close up picture. This is where there was a flaming log placed right up against the dutch oven so I think it caused that side of the oven to be hotter.

The last tip I was given was to use a clean knife to push into the middle of the loaf. If it comes out clean then the bread is ready.

tasty bread from a dutch oven

Above: The complete loaf. Not bad at all for a first effort. In fact it was one of the best breads I’ve ever tasted.

By the way, did you know that the phrase “the upper crust” comes from a time when those who could afford it would get the more valuable upper section of the loaf rather than the often burnt bottom. So the rich were referred to at the “upper crust.”

I hope this has inspired you to try dutch oven baking for yourself. I’ve definitely got the hook and have made a promise to myself to try a different recipe each time I go camping now. Suddenly the world of outdoor baking has completely open up to me. It’s a real sense of achievement.

Thanks for reading.

James K

bushcraft leader with shelter

My Bushcraft Journal: Part #1 Building Better Shelters

Hello folks. My name is James and I am an outdoor activity leader at Woodland Classroom, where we pass woodland skills and nature knowledge onto others with our sessions. Bushcraft is an element of what we do, fire-lighting, den building and campfire cooking etc but mostly it’s at a basic level. For a while now I’ve been wanting to improve my bushcraft skills and really go much further in depth not only because I love being out in the woods but also so that I can pass these skills onto others someday and continue to inspire children to fall in love with nature and being outdoors.

So, I’ve taken the plunge and enrolled on a 2 year Bushcraft Instructor training course which is going to really push me to up my game which is not only going to be a lot of fun but will also help me to offer so much more to our customers in the future.

Fire by friction, wild food, whittling, advanced shelter building, natural cordage and plant identification are just some of the skills I’ll be covering over the next two years. I’m quite excited.

Who knows, perhaps I’ll be able to call myself a proper bushcraft instructor when it’s all done. Saying that though, you never stop learning and with any good subject worth getting your teeth into, bushcraft is one of those fields of learning that the more questions you answer, the more questions there are. I imagine I will never stop learning.

Part of my training includes keeping a journal of my time learning bushcraft skills, so I though why not make it a blog and you can share my journey, my successes and my inevitable failures too.

As an old teacher once said to me though, “There are no mistakes. Just learning opportunities.”

So without further ado, here is my account of a day spent shelter building.

bushcraft leader with shelter

Building Better Shelters

Aim of the Day: To construct a one-person shelter using only natural materials, preferably with no cordage, which would be rain-proof.

I had a dry and sunny winter day to do this with no distractions which was good because proper shelter building is a lengthy task. From my training I knew that it took 6 of us a couple of hours to construct an effective shelter from scratch, so I would have my work cut out if I as to get it done all in one day.

There had been some recent tree felling work in the woods, cutting down young hazel stools under the power lines, so this as perfect material with which to construct the frame with as hazel is strong, flexible and being freshly cut it should have a longer life span than using older, more seasoned wood from the forest floor.

I wanted to build a classic kennel shelter, sometimes called the a-frame shelter, which uses just 3 sticks to support the whole structure. The shelter also has little room for movement once you’re inside so that there is less air space to be warmed up.

building a kennel shelter

Above: In Ray Mears’ Outdoor Survival Handbook, he describes the stages of building the kennel shelter.

The first task was to find a piece of ground that is flat, no mean feat in Wales. Another tip I had been given was to get down low to the ground so that you can see the small undulations that make up the lay of the land. This way I could pick out a spot that was not only flat, but would not be a pool for water if the weather turned wet and also was slightly raised from the surrounding land, again to shed ground surface water if needed.

My tutor had told me the importance of of ensuring that the triangular frame is locked together well and that each pole is well supported. The most effective way to do this (without using cordage) is using the method seen in the next picture.

shelter build - interlocking polesHere, the ridge pole is resting on both forked sticks and these are also interlocked. This should help prevent slippage and ensures that the weight of the shelter is evenly distributed. I don’t want it all coming down on me in the middle of the night. For some additional support, I saw that there was a convenient stump which I could rest the base of the right-hand pole against. This is certainly not essential, but a bit of added piece of mind.

Next up I started placing the uprights on either side of the shelter frame. These were no closer than a good hand span apart as if they were too close then I would have trouble weaving between them later when building up the walls of the shelter.

I had also been advised to not allow the uprights to stick up too much above the ridge pole as this would encourage rainwater to run down poles and then drip through into the shelter – which I imagine could be very annoying at 2am.

For weavers between the uprights I mostly used birch branches that were lying around the woodland, as when green they are still flexible. Any that were too far gone and dry, went in  a separate pile for firewood. It was time to start a fire for a well earned brew in my billy can. Think birch is quickly becoming my favourite tree because the more I learn about it, the more uses it seems to have – perhaps that’s the subject of a future journal entry.

Birch’s associations with fire are well known in the outdoor pursuits world and it makes great kindling for getting a blaze going. As soon as the fire was going I felt like I had arrived properly.

building a natural shelter in the woodsAbove: Burying the end of the ridge pole into the earth to help prevent it from slipping. Resting one of the forked poles against a convenient stump for added stability. And getting my tea on with my new billy can.

During my Bushcraft Instructor training we had plenty of bracken around us to use as a thatched covering for the weavers on the roof. You can see an example of that in the first picture on this blog page. But at my local woods bracken was not an option so I would have to go with the less effective (so I’m told) leaf litter – which was in abundance at this time of year. There was plenty of beech trees about and their leaves make a carpet on the woodland floor and I know these leaves to last pretty well rather than rot away quickly so this seems a good choice.  Using a blanket I could gather up lots of leaves quickly and then drag the full blanket over to the shelter.

This was still much more work than I had anticipated though and I had been advised to have a full arm’s length depth of leaf litter on the shelter to make it effective against the worst the weather could throw at it. This was a real eye opener as it soon became apparent just how much material I would need just for my little one-man shelter.

shelter building in the woods of wales

Above: The complete naked skeleton of my kennel shelter, complete with weavers from fallen birch with some hazel brash too for good measure.

Another thing I noticed when using the leaf litter was that leaves had a habit of tumbling down to the base of the shelter so that I was ending up with a lot of material close to the ground and hardly any on top. Stuffing handfuls of leaves between the weavers seems to help this to an extent as it gave the leaves something to grip to. But I wonder if this is also a common problem when using leaf litter like this and whether with enough depth of material you eventually over come it? I wasn’t going to find out today.

The day was drawing on and I still wasn’t complete. By the time the light was failing I had to accept that the shelter would not be completed today (the luxury of not actually being in a real survival situation) and I would have to return another day. I had got one side of the shelter completely covered with a fair depth of leaves, but by no means enough, and I was satisfied that I could return another day and complete the job, ready for a trial sleep out.

My last job was to put out my small brew fire and scatter the cold ashes to leave no trace – an important philosophy in bushcraft.

So, what were the main learning points for me:

  1. Shelter building takes longer than you think.
  2. It’s important to get the 3 main poles locked together correctly to maximise stability and strength.
  3. Don’t put the uprights too close together.
  4. Don’t let the uprights protrude too far above the ridge pole, so avoiding night time drips.
  5. If using leaf litter – allow for A LOT of material.
  6. Stuff the leaves into the weavers to encourage them to group to the shelter sides.
  7. Get up earlier in the morning and start sooner *laugh*

half built shelter

Above: The end of a day’s work.. well a leisurely days work anyway. I’m looking forward to coming back to complete the job and test it out.

That’s all for now. I hope to keep my Bushcraft Journal up to date with regular posts, so watch this space.

Thanks for reading.

James K

why kids should use axes

Why I would buy my kids an AXE

At a time when many children are being wrapped up in too much cotton wool (not literally) to keep them safe from the perceived hazards of modern life, I’ve become more and more a champion of allowing the children I look after (at Forest School sessions) to take risks and show they can be responsible for managing their own safety. So, with that in mind, we’ve been chopping firewood together, using a very sharp axe, and here’s a little video which shows you how I teach those basic axe skills to kids. I’d encourage you to try it for yourself.

Autumn has definitely arrived here in the UK and with the long, dark and cold nights closing in my mind’s turned to getting some firewood in. Yes, like many others I’ve left it late again. It’s always good to have some help with tasks like this and I’ve found that chopping firewood is an effective and simple activity for kids to get stuck into as well as a great introduction to the axe. Kids can understand the task and (most folks agree) splitting logs is very satisfying to do. So what about giving a razor sharp axe to a child? Well, here’s what the children’s author Roald Dahl had to say about risk;

“…the more risks you allow children to take, the better they learn to take care of themselves. If you never let them take any risks, then I believe they become very prone to injury. Boys should be allowed to climb tall trees and walk along the tops of high walls and dive into the sea from high rocks… The same with girls. I like the type of child who takes risks. Better by far than the one who never does so.”

Mabli (one of our regular Young Rangers) is just six years old and it was really encouraging to see her progress recently from using the potato peeler (which we give to kids first to practice their knife technique) to using a proper whittling knife. She was confident, calm and sensible with the tool, which I like to think she learnt through clear mentoring, encouragement and close supervision. There’s a voice in my head which jostles for centre stage telling me that there’s going to be a terrible accident and that it would be better to just let kids like Mabli play at something safer. But of course, children are just like us, they don’t want to hurt themselves, so along with a good mentor (like any parent), they’re their own regulator.

teaching children to use an axe

Anyway, back to the axe and chopping wood. I think this is a great introductory activity for kids to sharp tools as with an axe you have a fair distance between the sharp edge and little fingers. Also, whoever heard of such a thing as an ugly piece of firewood? So, no fine craft skills are required. You could even follow wood chopping with learning fire-lighting so that they get to burn what they’ve chopped themselves. I’ll give the last word on ‘risk’ to Richard Louv, author of the fantastic book Last Child in the Woods;

“An indoor (or backseat) childhood does reduce some dangers to children; but other risks are heightened, including risks to physical and psychological health, risk to children’s concept and perception of community, risk to self-confidence and the ability to discern true danger.”

So, would you use sharp tools with your own kids at home? Have you had success with whittling, wood chopping or using a saw with little ones? We’d love to hear from you.

If you enjoyed this video, we’ve got MORE videos on our YouTube channel giving you ideas for engaging kids in the great outdoors. You can find it by clicking HERE.

Social Share Buttons and Icons powered by Ultimatelysocial